It’s been ages since I’ve been in Second Life, or online for that matter, due to unforeseen changes in my real life. So I’m going to be relearning many things and learning a bunch of new stuff that has changed. I have a new account, but am going by the same name in Second Life. (In an official search I’m Kinanni, if anyone would like to look me up.)
Dear Lindens: Stop Being Assh*les.
If you haven’t heard by now, the Emerald Viewer has been defeated. Perhaps the greatest team effort to ever come from Second Life, and LL has pushed them out. I’ll try not to focus on how LL no longer listens to their users at all or how they’re shooting themselves in the foot, though. I’ll add a link to the Emerald blog so you can get the story first-hand, just as soon as I can find the link.
For now, I’m downloading Kirsten’s Viewer and will review it soon.
Happy SLing.
Filed under Uncategorized
Review the View: Part Three (Second Life Viewer 2.0 [Beta])
If you play Second Life, chances are good that you’ve heard of the infamous Viewer 2.0. The Lindens have told us that they are focusing more on new residents and trying to make the transition from browser to viewer easier. Well, I’m not a new resident, but I gave Viewer 2.0 a try. I can sum of the rest of this post in one, nice little sentence for you. I will be sticking with Emerald.
After downloading Viewer 2.0 and logging into SL with it for the first time, my initial reaction was “Holy crap!” It was completely different from any other viewer that I’d used and I did not like it in the least. Before we continue, let me say that I didn’t spend a lot of time looking through every feature. I spent perhaps a total of 30 minutes logged in before I switched back to Emerald. However, here’s what I found in the time that I did use it.
My first thought was this looks different from the other viewers, but it probably functions in pretty much the same way. Boy, was I wrong.
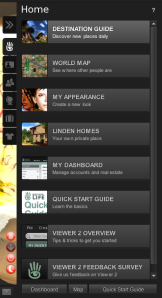
Just about everything you do in-world is controlled from that nice little [huge] sidebar you see on the right of the screen. Of course, you can use the >> to minimize it, but you have to open it back up to do anything. And every time you open it, it distorts your view. That’s right, it doesn’t “overlap” SL like most things we’re used to. It just “scooches” right down in there and makes the screen look bunched up. I’ll not go into great detail, but let’s take a little closer look at that sidebar…
Now, if you want to do anything in SL, you’re probably going to have to use this sidebar. The Second Life hand logo shows you what is shown in the image — the basics, if you will.
The second icon, which looks like an ID card, is, well, your ID. (Your profile.) I’ve noticed so far, that the profile pictures are set to a different ratio than in previous viewers, so all of you that spent so much effort on getting the right profile picture — sorry, LL doesn’t seem to care. Not only that, but second life, first life and web tabs have all been smushed into one. In fact our profiles only have two tabs now. The other being picks. I don’t know where the rest of the tabs went (and I’m not saying there isn’t a way to access them, as I didn’t spend enough time looking to know for sure), but I can’t find them anywhere. You’ll be thrilled to know that other users have three tabs, though. The third being Notes & Privacy. Yup, as far as I could tell, you have to go to people’s profiles to set privacy and privileges.
Now let’s move down the line to that little people icon. This one doesn’t seem quite so bad…so far. You open up to “Nearby” which shows you who is around you. Yes, it seems LL has adopted the radar feature. You have three other tabs which are “My Friends” “My Groups” and “Recent”. Most of these should be self-explanatory. The recent tab shows you a list of those you have communicated with recently. I had a chat open, and this tab showed “3m” next to the person’s name. For some odd reason, my brain has linked “m” with meters when talking about SL. (Go figure, right?) Apparently, this tab keeps a record of how long it’s been since you and said people have communicated, and the m meant minutes.
Let’s move on to the tab that shows us a picture of a globe. This is your “Places” tab and it contains LMs and TP history. There is one thing I like about this. We now have a favorites bar. It looks like a LM that you put here will stay at the top of the list for you to access more easily. When you log into SL with Viewer 2.0, it automatically creates this Favorites bar, which will appear as any other folder in other viewers.
Now let’s look at the tab with the suitcase icon. This is your inventory. We have “My Inventory” and “Recent”… The inventory works basically the same as it always has.
Last, but not least, we have the “Appearance” tab which looks like a T-shirt. LL has finally decided to adopt the “Worn” tab feature that other viewers have implemented, but of course, have put it in the wrong place. You’ll find it here, along with another tab that says “My Outfits”. Now, we older users would probably think that the Appearance tab would be like editing our appearance. Nope. I don’t see any use for it, really. It’s just an extra tab to give us a headache and make our inventory choppy. To edit your appearance, you still have to right click your avatar, which IMHO will be more confusing to new residents.
Now let’s get out of the sidebar and look around a bit, shall we? LL have removed the pie menu upon right click. We now have a standard drop-down menu. It doesn’t seem like much difference, but it’s been more difficult to find what I’m looking for in my experience. I also have noticed Camera Controls and Movements have been relocated to the bottom of the screen. They can be accessed and moved around, though. The build menu has been relocated to the top — a small annoyance. The media options (to play music and video) have been relocated to the top right corner, along with volume controls. The search function has been moved to the top right corner, as well. You enter your keyword(s) and search. Upon searching, you will be greeted by a nice shiny pop-up box with your results and can browse from there.
One good thing I do like about Viewer 2.0, is the “Back” and “Forward” buttons at the top left. These act like back and forward on a browser, and will take you through your previous locations. Sadly, this is the only positive I’ve seen.
If you’d like to give Viewer 2.0 a try, you can get it here.
Disclaimer: No, I do not own SL. Yes, LL has the right to do as they please. No, I don’t think my opinion matters to LL. I write this because I have an opinion. You want me to have an opinion too, I assume, or you wouldn’t be reading this. All in all, I realize that LL has a business to run, but they say they welcome user feedback, so I’m simply providing them with some, and I hope a few of you benefit from it. :-)
Filed under Reviews
Profile 101: Second Life Tab
I’ll be starting a new series; Profile 101. This will be the basics of how to get the most out of your profile. Your Second Life profile can be an important tool for everything from forming new friendships to snagging that dream job. The first thing many people do when they hear your name is research your profile. It gives us an idea of who people are, and what they want to do with their Second Life. It’s like a built in Facebook for your avatar.
The first tab we’ll be exploring is the Second Life tab. This is what shows as the default when you open a profile and it tells us the basics of a person’s Second Life.
The top half of this tab holds the very basics. This includes name, DOB (the date they signed up for SL), resident/employee info, payment info and partner, if applicable. (For more info on partnerships in SL, click the ? icon next to the partner field on your profile.) The only item of these that you can change is your partner and you do this by going to the SL website. In this area, is also space for a picture. See How to Change Your SL Profile Pictures.
The bottom half of this tab displays your groups and your “About Me” section. When you join a group, it will automatically be displayed here. To hide your group, open the group info from your contacts, and uncheck “List group in my profile.”
The About Me section is pretty self-explanatory. You write a bit about yourself. Since there is a first life tab, I would suggest focusing on your avatar’s personality in the Second Life About Me. For example, what you like about SL, what you do with your time while you’re in-world, if you have any special interests like building or an organization. Be creative. :)
At the bottom of the Second Life tab, there are two important, but often overlooked, features. Give item and show in search.
Next to the words “Give Item,” you will see a box which says “Drop Inventory Item Here.” To offer this person an item, be it a notecard, a landmark, or an awesome pair of shoes you stumbled upon and want to share, just open your inventory, find the item and click and drag it to that box on the person’s profile. If the person is offline, the item will be saved and offered to them when they log in.
The show in search feature is really very simple. It is asking you if you want your profile to show in the People searches to enable others to find you more easily. If you don’t want to be found, just uncheck the box.
I’ll be updating the rest of this How-To soon and we’ll continue right on down the row with the rest of the profile tabs.
Filed under How-To Guides for SL Beginners
Happy Holidays!
I’ve, again, neglected my blog for some time. I’m making it one of my New Year’s resolutions to get back in the swing of things, though. I wanted to take a moment to wish everyone, RL or SL, Happy Holidays.
I’ve been building a snowman to share with my friends to celebrate the season. His name’s snowy. He comes with a “Happy Holidays” sign and even plays a little tune for you when you click him. If you’d like to have a copy, send me an IM in-world. (Kinani Exonar)
Filed under Uncategorized
Halloween Freebies
Due to RL, I’ve neglected my blog a little bit. But in an effort to get myself to spend more time on it, and in celebration of the beginning of my favorite time of the year, I’m creating a trick or treat bag of goodies. It’s full of fun stuff from eyes, to t-shirts, to decorations and more.
To get ’em, just send me a “trick or treat” IM in-world. (Kinani Exonar)
Tell all your friends, link to your blog, tweet it out. The more interest I get in this, the more I will make for other holidays.
Filed under Uncategorized
Review the View: Part Two (GreenLife Emerald)
If you haven’t seen Review the View part one, please check it out so you can get a better idea of what I’m doing here. In that post, I said I’d add more viewers as I experiment with them. Well, Emerald turned out to be so great, I thought I’d write a post dedicated just to it.
Some things I noticed about Emerald were:
- The option to change your draw distance being displayed right on the main tool bar. So you don’t have to go to preferences every time. I also love that you can lower it all the way down to 24 m. If you’ve tried playing Second Life on a connection as slow as mine and with a computer as cruddy as mine, you know why. :-)
- The fact that Emerald also offers RLV. (Again, I’m not going into what this is, but if you have a need for it, you’ll know.) I was afraid that I would lose RLV features if I stopped using Hippo because I had never heard anyone mention it in relation to Emerald.
- Temporary upload of textures. You can upload for FREE and do tests to make sure it’s right. If it’s not, just adjust it and do another upload. Don’t worry about wasting L$10 every time you want to test your designs.
- Channel selector button next to local chat bar. Maybe this was offered with other viewers, but I don’t remember seeing it.
 Key and group member options in group chat windows. (I realize you can’t see the picture, but in an attempt to save the flow of this list, I made it very small. Just click it to be redirected to a larger version.)
 A key on every profile page (just above the name), avatar’s age in days (next to birthday), and pop-out profile picture viewer (works on both 1st & 2nd life pictures).
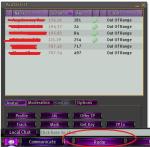 A Radar button right on the main toolbar on the bottom of your screen. The radar gives you information about nearby avatars.
- Double-click/point-to-point teleport. Just double click on the ground somewhere and TP right to that spot.
- Double-click “wear” items from inventory. Again, just double click and they will attach to your avi.
- Worn tab in inventory. Shows all items your avi is wearing (including attachments and HUDS).
- Crazy amount of skins options for your viewer. (15!!!)
 Selection beam particle effects. (Rainbow beam and 19 different particle effect options.) Just go to Edit > Preferences > Emerald > Avatar.
 Enhanced zooming. Emerald allows you to zoom in on objects and avatars to a much higher degree than other viewers. You can also zoom in much, much, much more on your mini-map. Please see this image. The difference is amazing.
 More detailed edit menu. Other viewers generally allow you to edit an object’s size, position and rotation up to a thousandth of a meter. (0.000) Emerald lets you edit these up to a ten thousandth of a meter. (0.0000) You can also edit flexible values and textures with more detail. And you even have a larger “shape” list within the object tab, so no more object manipulation just to get a basic shape. :-)
These are just the first things I noticed and I’ve only been using Emerald for two days now. I’m sure there’s more that I’ve yet to discover.
Oh! I almost forgot to mention. I’ve yet to have Emerald crash on me. I liked Hippo, but it disappeared on me often. So if you’re in the market for a stable viewer, give GreenLife Emerald a shot. :-)
*Items in orange are also present on Hippo.
Filed under Reviews
Free Profile Pictures
I’m doing a new project to showcase the various avatars throughout Second Life. Basically, if you will let me take your picture and hang it on my wall, I’ll give you free full-permission copies that you can use for profiles, or whatever you want. If interested, just contact me (Kinani Exonar). I would prefer you contact me in-world, since I am online daily. If you must, you can contact me here, but I don’t make it here every day. Be prepared to wait a day or two if you contact me through this blog.
Filed under Uncategorized
How To: Building Part 2 (Additional Thoughts)
In this post, I’m going to explain a few things that aren’t necessarily within the tabs of the build menu. You may find them useful.
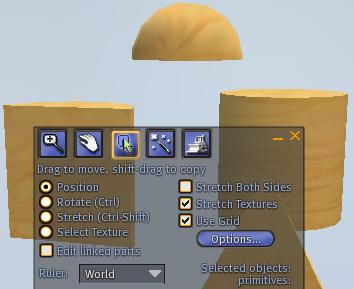
Let’s start with the top of the build menu. On the left, you see position, rotate, stretch and select texture. I touched on these in the object tab post, but I didn’t explain your options located here. You can simply click one of these options instead of holding down a keyboard shortcut.
In this image, you can see what your screen will look like if you select these options. Rotate and stretch can be done with keyboard shortcuts. Position and Select Texture must be done by clicking the options within your menu.
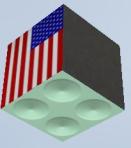
Let’s touch on select texture for a moment, since I didn’t talk about this with the texture tab. Select texture allows you to place multiple textures on different sides of one prim. To do this, simply select your prim, and click Select Texture. After you’ve done this, click on a side of the prim. When you have changed that texture, choose a different side and continue.
.
.
.
.
.
.
.
.
Let’s move on to Edit Linked Parts. This is used when you have an object that is composed of 2 or more prims. To link parts, select a prim, press and hold CTRL, and select the rest of the prims you want to link. When you have them all selected, press CTRL+L. (Note that the last prim you selected will the base prim of the object you’re creating.) When you have prims linked and you only want to edit one, click Edit Linked Parts and click the prim you want to edit. To unlink, press CTRL+SHIFT+L. If you have the entire object selected, all prims will be unlinked. If you use edit linked parts and select one (or a couple) prim(s) then only those selected will be unlinked, while the rest stay linked together.
Below this, we have Ruler. These options will show coordinates in a different manner.
Now, let’s go to the right side. Here, we have Stretch Both Sides, Stretch Textures, and Use Grid.
Stretch Both Sides may be a bit difficult to put into words, but if you play with it, you’ll realize what’s going on. Basically, when you manually resize the object, instead of growing in one direction as in ___ it will grow in both directions like ___ .
Stretch Textures is similar in theory. When you resize the object, if Stretch Textures is selected, the texture will remain in the same proportion to the size of the object. If it’s not selected, the texture will change how it repeats on the object’s surface.
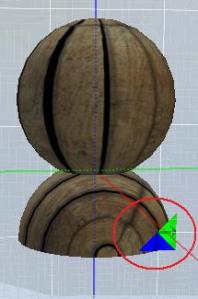
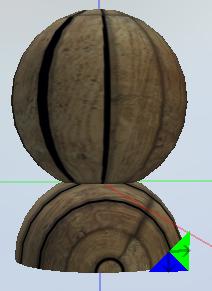
Finally, Use Grid is basically….a grid. :-) You can use the grid by, obviously, having it selected and clicking the arrows you see at the corner of your object. See the image for more detail. If you don’t have Use Grid selected, you will see something similar to the second image, and be able to move the object freely.


